Oracle VirtualBox |
As already noted in the chapter about 'Virtual PC 2007' software to support virtualization allows a virtual computer (VPC - Virtual Personal Computer) operating system that through intermediaries - VIRTUALIZER uses natural resources of the actual computer and emulated computing resources offered by the virtualizer. As Microsoft no longer supports this type of program support, as well as effective and quality solution imposes the 'Oracle VM VirtualBox', a free Open Source Software, as a platform for a variety of hosted (guest) operating systems. Basic software products of VPC are:
|
So virtualization that can be achieved on different operating systems, basically intended for computers that are based on x86 and amd64 platforms. In addition it is possible to download the 'Oracle VM VirtualBox Extension Pack' program support which provides additional features, and 'VirtualBox Software Developer Kit (SDK)' for developers, which contains all the documentation about interface files that are needed for writing programming code that will work in interaction the 'VirtualBox' programmatic support. The number of the hosted operating systems is impressive:
VirtualBox is a cross-platform virtualization application. What does that mean? For one thing, it installs on your existing Intel or AMD-based computers, whether they are running Windows, Mac, Linux or Solaris operating systems. Secondly, it extends the capabilities of your existing computer so that it can run multiple operating systems (inside multiple virtual machines) at the same time. So, for example, you can run Windows and Linux on your Mac, run Windows Server 2008 on your Linux server, run Linux on your Windows PC, and so on, all alongside your existing applications. You can install and run as many virtual computers as you like - the only practical limits are disk space and memory.
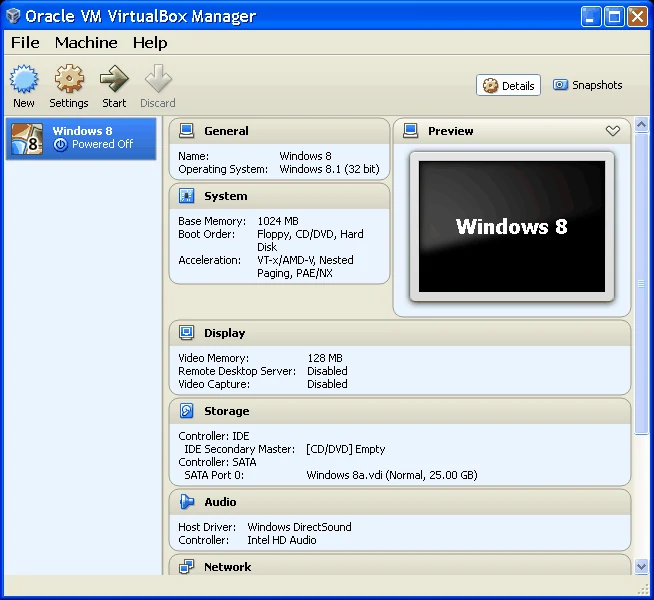
Working VPC console, called the 'Oracle VM VirtualBox Manager' is shown in the following figure, consists of a line drop-down menu, several icons to quickly manipulate virtual machines and on the left side of the window icons are made for each virtual computer (virtual machine). The icon does not change its appearance during operation a virtual machine, but it changes the look on a small monitor when viewing the virtual computer settings according to the example in Figure 5.

|
|
| Figure* 1. 'VirtualBox' console. ( + / - ) |
The space on the right side of the console, which initially are simple guidelines to Figure 1, made after the first virtual computer, contains information about the currently selected virtual computer according to Figure 5a and 5c. Before making themselves virtual computer can adjust several settings, the program support the choice /File/-/Preferences.../ according to Figure 1b and opens a window in which part of the settings described set of Figures 2.

|
| Figure** 2. Preferences of 'VirtualBox' console. ( + / - ) |
Preferences have been common for all virtual machines and can not be changed if any virtual computer is active. In Figure 2a shall be choosing a selection of the directory (folder) /General/-|Default Machine Folder| in which to store the contents of the virtual machines and the well is to create the directory (folder) and choose the largest available partition, otherwise the contents will be stored on the system partition, which is very inappropriate. If you later change this directory, then made up a virtual computer should be copied into a new directory (folder) by using WE.
Select /Input/ to redefine keyboard shortcuts, /Update/ allows for automatic upgrade program support, /Language/ choice of language interface of program support, /Display/ with options |Maximum Display Screen Size|-|Automatic-None-Hint| to define the behavior virtual computer window (Figure 2b), /Network/ to select the network usage and there should not be anything to change (leave as shown in Figure 2c), and define the remaining two choices if necessary.
Selecting icon |New|, according to the following figure to create a new virtual computer with new name of virtual computer, entering the name of it in the form |Name:|, and in the drop-down menu in the form |Version:| selects the OS will be a guest.

|
| Figure** 3. Creating a virtual machine and devices. ( + / - ) |
In Figure 3b shows the ability to change the size of working memory of virtual machine (virtual computer) where the green area indicates the extent recommended according to the available physical memory of the computer, and the assembly method for creating a virtual disk. Good to immediately choose |Create a virtual hard drive now| according to Figure 3c to the designing a new virtual machine (virtual computer).
When creating a virtual disk offers more choices as shown in Figure 4a. First choice |VDI (Virtual Disk Image)| is the default and it is best to choose, the choice |VHD| is interesting because it is compatible with the 'Microsoft Virtual PC' format, |VMDK| is compatible with program support 'VMware' while others have their special characteristics, which can be read in the instructions for the user, which can be downloaded from the Internet as .PDF document. But for any choice recommendation is to choose |Dynamically allocated| creation of virtual disk according to Figure 4b because the file size of the virtual disk dynamically change as the disk fills the content, which is certainly a better choice than |Fixed size| where it occupies a certain portion of a physical disk anyway it is completed although the constant disk size is better with respect to performance.

|
| Figure** 4. Creating a virtual disk. ( + / - ) |
Figure 4c shows how it assigns the name of the virtual disk, and can choose another location instead of the default according to Figure 2a. In addition it can be offered to change the size of the virtual disk as the dynamic virtual disk is of particular importance. Software 'VirtualBox' offers different size virtual disk in accordance with the selected the guest operating system.
Once the basic parameters of the virtual machine defined, everything is done is shown in the console how display Figure 5a, and Figure 5b as continuation.

|
| Figure** 5. Console with created virtual computer. ( + / - ) |
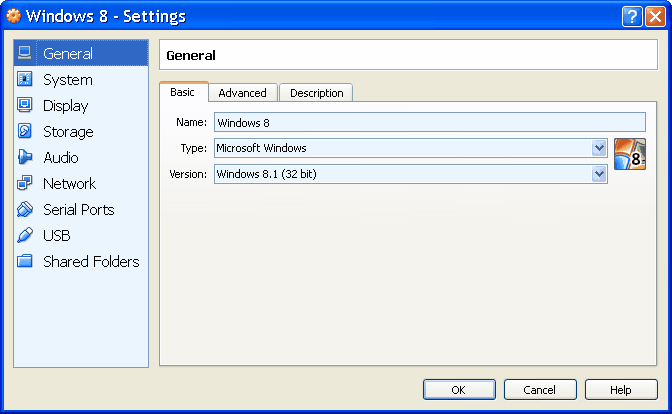
The difference between Figures can be noted that Figure 5b shows the two created virtual disks. Therefore, certain modifications are possible configurations of the virtual computer actions L2 on the icon and selecting the virtual computer |Settings...| as shown in Figure 5c.
Selecting |Settings...| by the above applies to configuring each virtual machine individually. The next set of Figures showing how to add a new virtual disk to a virtual computer.

|
| Figure** 6-1. Basic settings of the virtual computer. ( + / - ) |
It is important to note that changing settings of the virtual computer are not possible if the virtual computer is active. In addition to the previously shown to possible changes in the virtual computer settings, it is possible to adjust some other settings, of which the most important are shown on the next set of Figures.

|
| Figure** 6-2. Additional settings of the virtual computer. ( + / - ) |
Most of the settings of a virtual computer program support 'VirtualBox' will do itself by analyzing the physical capabilities of computers as opposed to a guest operating system selected. In order to function option |Shared Folders| according to Figure 6-2f, it is necessary to install an additional program support from VBoxGuestAdditions.iso file that is located in the directory where is installed program support 'VirtualBox'. Additions included in this file applies to Windows, Linux, Solaris and OS/2 operating systems in 32-bit and 64-bit version and their work depends of the driver file type .sys installed in the system directory of the operating system on the host computer.
When everything is defined in the directory (folder) selected according to Figure 2a will create a directory with the name of the virtual machine in which the content is presented in Figure 7.
 |
|
| Figure 7. Folders and Files of virtual computer. |
File Windows 8.vbox in this case is nothing but .XML file similar in function as well .VMC file in the 'Microsoft Virtual PC 2007' program support. Windows 8a.vdi and Windows 8b.vdi files are virtual drives.
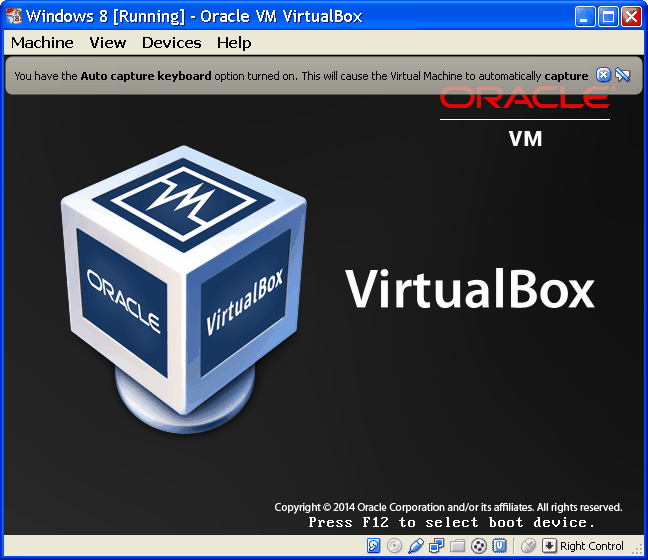
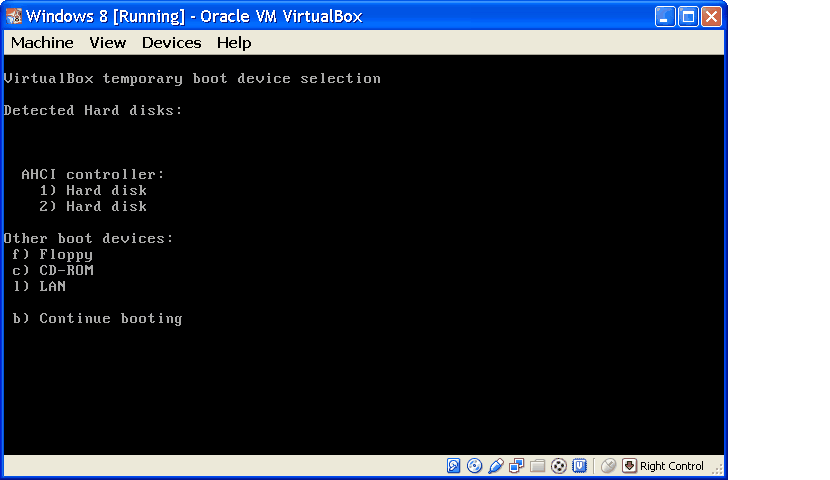
After creating the virtual computer (virtual machine) setting its activation is done by selecting the computer (L1 actions on the computer icon at Figure 5) selection of an icon |Start| which is then active. Then content of the BOOT device or .ISO file is loaded in the window that belongs to the selected virtual computer whose starting work is illustrated on the next Figure.
 |
| Figure 8. Running a virtual computer. |
Figure 9a shows that the BOOT device is found by program support 'VirtualBox', but should attach them (mount) to be active.

|
| Figure*** 9. Adjusting the installation of program support. ( + / - ) |
In Figure 9b is evident that the three devices are available: Host drive 'H:', Host drive 'M:' and Host drive 'W:'. The first two letters of the virtual optical devices are program support 'Alcohol 120%' and 'Virtual CloneDrive' but the third letter belongs to a physical optical device. When some of them is chosen in front of the name will be set 'peg' and then must be executed to restart the virtual computer by choosing |Reset|. This option is inactive if the virtual machine is not running. Optical contents or their image uploaded by the specified program support must have BOOT characteristics. Of course the Linux OS will be different labels for the devices.
In addition to the use of optical devices as described can be retrieved .ISO file by choosing |Choose a virtual CD/DVD disk file...| as shown in Figure 9c. Can be recognized more file formats as .DMG and .CDR files and of course files must have BOOT content.
When the virtual computer starts by choosing shown in Figure 9d enables to adjust the window size of the virtual computer as desired. It should be kept in mind that the key combination <Host>+<C> to adjust the window size of the virtual computer 'expanded' as desired (Scale mode), and the process <Host>+<A> (WindowAdjust mod) and then <Host>+<C> gives an overview over the entire screen (Full Screen) when available drop-down menu shown in Figure 9. Key <Host> physically does not exist, it is a virtual button that actually serves real key <Right Ctrl> written in program support 'VirtualBox' what can optionally change.
So, 'VirtualBox' program support imitates-emulates a standard PC. Imitate all key components of computer except microprocessor as follows:
If we take into account all the solutions for hosted virtualization of computers, 'VirtualBox' definitely belongs in the top of the of program support dedicate for this purpose, especially because it is free and extensible various accessories. Also because manufacturer regularly improves and upgrades product. An example of using VirtualBox program support is described in the Chapter about operating system 'Windows 10'.
Use of 'NTLite' software and installation of 'Windows 10' operating system on a virtual computer made by software 'VirtualBox' (newer version) is described with 120 images in the file which can be downloaded here.
|
Citing of this page: Radic, Drago. " Informatics Alphabet " Split-Croatia. {Date of access}; https://informatics.buzdo.com/specific/file. Copyright © by Drago Radic. All rights reserved. | Disclaimer |