Complete installation of Windows 7 |
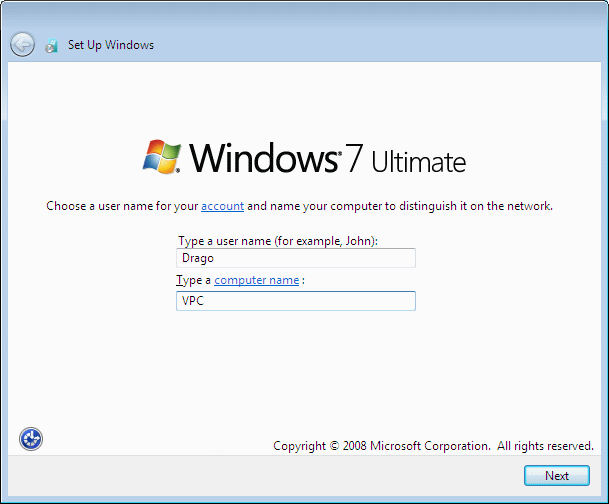
In the final part of the installation, during the execution of the five stages shown in Figure 4.5.9 and multiple computer restarts following the completion of the installation files and activate the required services (fifth stage), another repeated the computer as a final run the operating system in respect of its first use, and should therefore be enter a user name and computer name. Name and surname of the user may subsequently record the description field in the user. As noted above users 'Administrator' is not allowed by default, or disabled, and the installation does not require entering the password belonging to him that it was customary in installing the Windows XP operating system. Required entry ||Use Name|| and ||Computer name|| for a single user is shown in Figure 4.5.10a.
|
| Figure** 4.5.10 Define user, time zone and type of network. ( + / - ) |
Upon the entry of user names and host names, the next action that requires users to enter a password and a keyword that you enter a new password if the same forgotten. Follows the form for registration serial number of the product - Key (Product Key), include the label to activate the product by the first application on the Internet. The serial number of this version belongs downloaded free .ISO file and obtain the report by filling out the personal information and verifying authorization regarding takeovers. It is then necessary to choose one of the three groups of settings to configure the system, for example |Use Recommended Settings| as the simplest, followed by a prompt to select the time zone (Figure 4.5.10b) and choice of network access (Figure 4.5.10c). Should be read carefully as certain types of network affiliation allows, because the descriptions are very similar. Of belonging to an internal home network should also select |Home network| to Figure 4.5.10c.
The user's computer, not identified by a user name for the number that the user is granted (user ID) and that the user sees. When creating the user is done making him belong to their respective folders and copy the files to him on the basis of the prepared forms. Files are allocated to mention ID. If the user deletes it after installing the associated files are automatically deleted not only its ID and name in the user database. Leftover files by deleting the users need 'manually' deleted. If you can then re-create a user with the same name, created a brand new user who has a different ID and creates a group of files that belong to the new user to the system, there are two groups with different ID directory where the initial directories have the same name although both begin with the same the name of the user. ID is important with regard to the grant of rights to the files, so that makes it impossible to read data that the user does not belong.
After selecting the type of network operating system installation is completed. In doing so, the resolution of the display on the screen automatically adjusts the range graphics cards but this time was changed to 800×600 image to be eligible for this site.
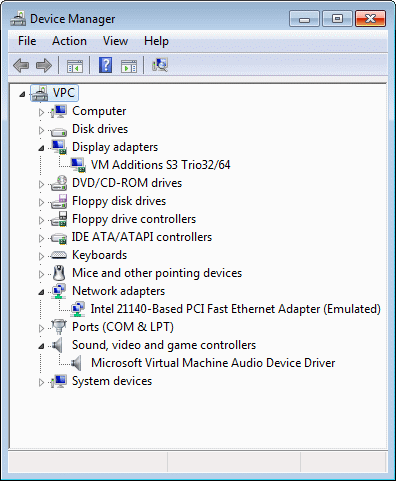
Insight into the 'Device Manager' shows that the devices installed. In Figure 4.5.11 were selected examinations devices that are typical for the VPC.
|
| |
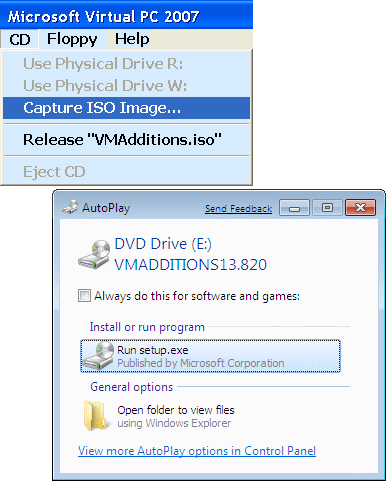
| Figure 4.5.11 Devices of VPC computer. | Figure 4.5.12 Installing VPC files. |
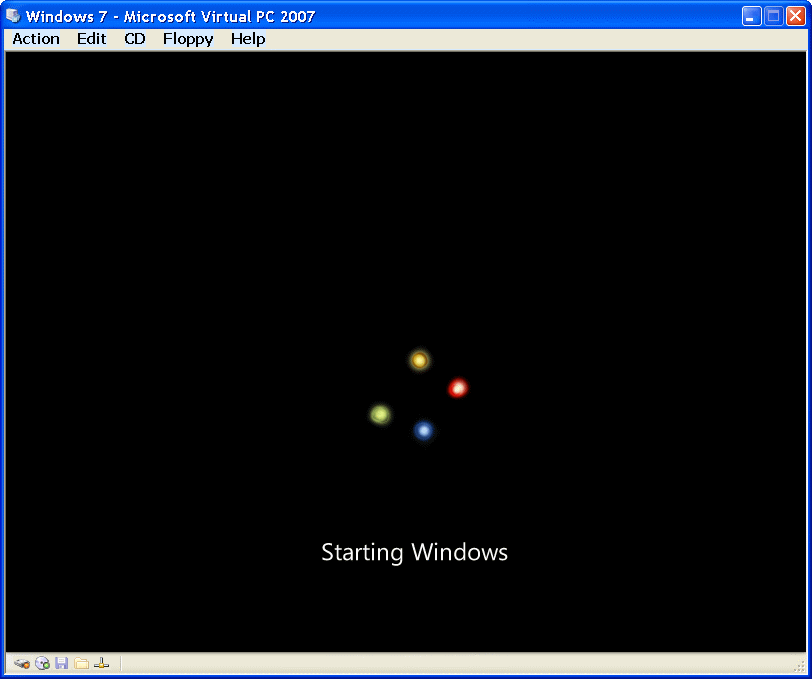
VPC sees all physical devices and computers where it is located, but it is still not known as a physical disk access or fully recognizes all devices, it does not recognize all the properties emulated emulated graphics card or audio device. For this purpose serves files 'VMAdditions.iso' which is located in the folder in which it is installed VPC program support. Should rid installer .ISO and 'hook' above, to wait until the contents of the specified file is not activated and asks to install add-ons to the system (Figure 5.4.12), which allow the VPC install the client software that enables the selected folder see the physical disk as a network 'mapped' drive in VPC computer. After installing this plugin VPC automatically re-starts (reset) where release attached 'VMAdditions.iso' file and follow the start-up screen as shown below.
|
| Figure* 4.5.13 Initial Windows 7 logo when you turn on your computer. ( + / - ) |
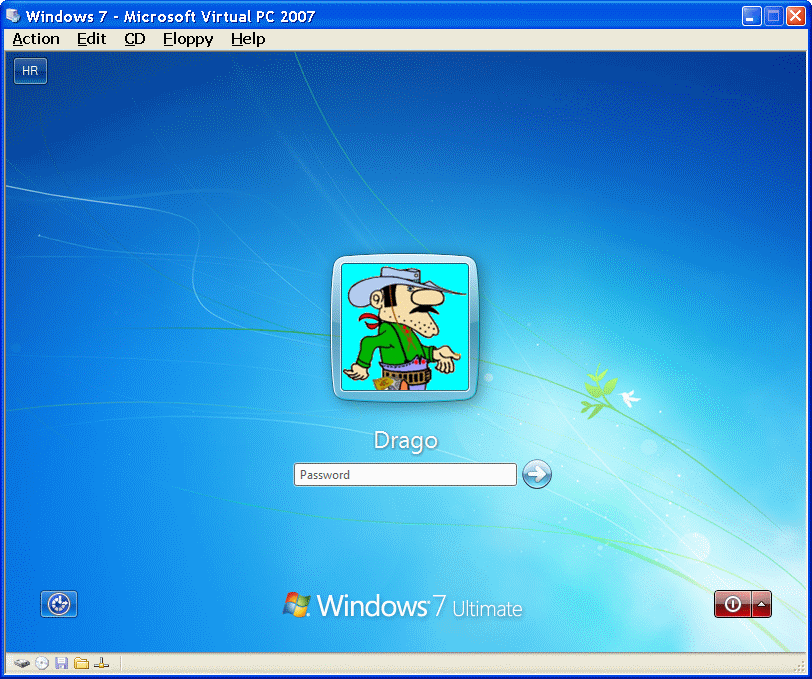
After rotating 'stars' logo appears in 'Windows' operating system, and follows the logging back to a defined user name and password request for registration, which is probably not forgotten :-). After successful registration is useful to 'liberate' .ISO file with extras. A brief note about the mouse cursor. Action L1 window VPC automatically assigns the device as a mouse and the mouse becomes trapped in a window VPC's. Released by pressing <Alt Gr> (right <Alt> key on the keyboard).
|
| Figure* 4.5.14 Login of defined user on the system and its possible actions. ( + / - ) |
In the upper left corner of the desktop displayed and is button that activates the menu to select the appropriate letter on the keyboard layout. Blue button in the lower left corner in a new window written and spoken instructions (I guess the latter would not throw in the final product) on the additional functionality regarding setting facilitated by a computer. Selection of the red fire button (rectangle with an arrow) to shut down computer or restart from the beginning (Restart).
When a user logs on to the system properly, but familiar action <CTRL> + <ALT> + <DEL> or <Right ALT> + <DEL> on the VPC window, offering a choice to add a fine selection |Cancel|. This selection is shown in Figure 4.5.14b from which the most interesting is a locked computer, the moment when she must leave for a short position and will not snuff out all the windows and turn off the computer, or terminate the current activity. A screen will hide all signs of the remains just logon to unlock.
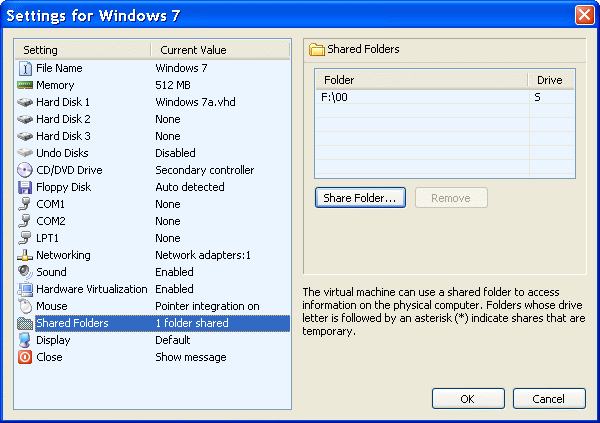
How to get working products from VPC easily transferred to the physical disk resource to become available on the host computer to the VPC on a disk partition creating a folder (map, directory) that is activated in the settings selection /Edit/-/Settings/-|Shared Folders| of VPC COMPUTER declare (mapped) as a disk. Selecting the drive letter is arbitrary, and in this instance to take the letter [S:] according to plan in the pre-established table. If there is a need for access to another folder, the physical disk from the VPC, stated a letter by a new entry to the current, which is shown on the right side of the next image. Of course, the new associate letters can not be already used the letter. Action of adding a folder available is done with the 'turned-on' VPC computer or operating system must be running.
|
|
| Figure 4.5.15 Assignment physical folder of disk to VPC as a virtual disk. |
This is one very nice feature of Virtual PC program support. If the user of the computer has enough hardware resources for simultaneous use of multiple VPC, as described above can be achieved exchange data between them. So the available virtual disk resources are available and the physical disk resources defined using VPC, as shown below. If the physical computer has enough hardware resources for simultaneous operation of multiple VPC, the data exchange between them through shared folders available it is easy to accomplish. But what particularly fascinated by the VPC computers do not have the same network settings or belong to the same network group. Reason enough for a professional to work for everyday use really powerful computer. The effectiveness of exercise, experiment or classes in this area was in this way increases significantly.
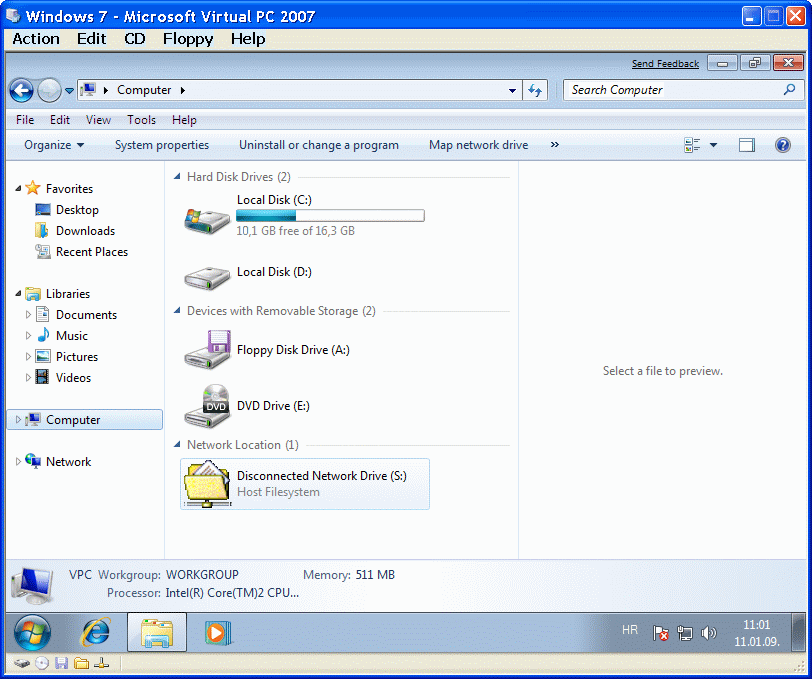
Window 'Windows Explorer' (WE) versus of the much richer content than their older brothers (as for example in Figure 4.3.8, and no XP is not much more effective). Assets are the usual key combination <Windows> + <E> and display PC content informative and has additional fields for different type of information beyond the usual. The following Figure shows the status of disk resources to the point that is described in these pages. VPC disk [S:] can be seen as a network resource.
|
| Figure 4.5.16 Conditions disk resource computers and VPC after installation of the OS. |
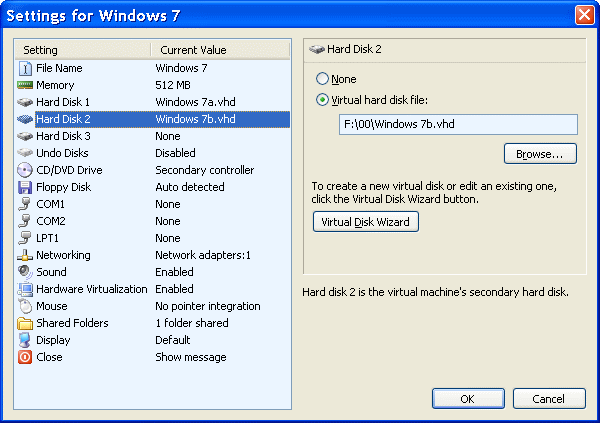
Virtual disk is divided into two partitions (two logical disk), of which only one is available, formatted and that also primary and active. It is installed on the operating system. In Figure 4.5.16 This was reflected in the data on the disc size [C:] and its availability, and drive [D:] without data. In order to realize the planned installation of the sample the table in the system should add another disk, virtual course. Is specified using the wizard to create a new disk. Adding a new virtual disk is done through setting the VPC CONSOLE of choice /Action/-/Settings/ the 'turned-off' VPC computer or operating system may not be running as a way of adding a new virtual disk shown in the following Figure.
|
| |
| Figure 4.5.17 Joining other disk to VPC. |
The process of using a wizard or not explained in the description of the VPC's, for detailed instructions and you should always consult the literature or run the wizard (Button |Virtual Disk Wizard|) and follow the instructions that are very well written. Offered a location for the virtual disk and its name can change at will, and so made a new disc called 'Windows 7b.vhd', created using a wizard, adds Choice |Browse...| made by selecting 'Windows 7b.vhd' files . It is not superfluous to mention once again that all records on the configuration of the VPC kept him in the associated 'Windows 7.vmc' file. Make no mistake, the displayed disc [C:] and [D:] (Local Disk) in Figure 4.5.16 are partitions that are part of the overall volume of the virtual disk 'Windows 7a.vhd' created as explained on the previous page, while facilities 'Windows 7b.vhd' still do not see it, because the disc has not been defined or formatted disk partitions. This will be done later on admin tools, and only then the data will be entered for the second drive in the MBR and become visible to the operating system.
|
Citing of this page: Radic, Drago. " Informatics Alphabet " Split-Croatia. {Date of access}; https://informatics.buzdo.com/file. Copyright © by Drago Radic. All rights reserved. | Disclaimer |