Complete installation of OS |
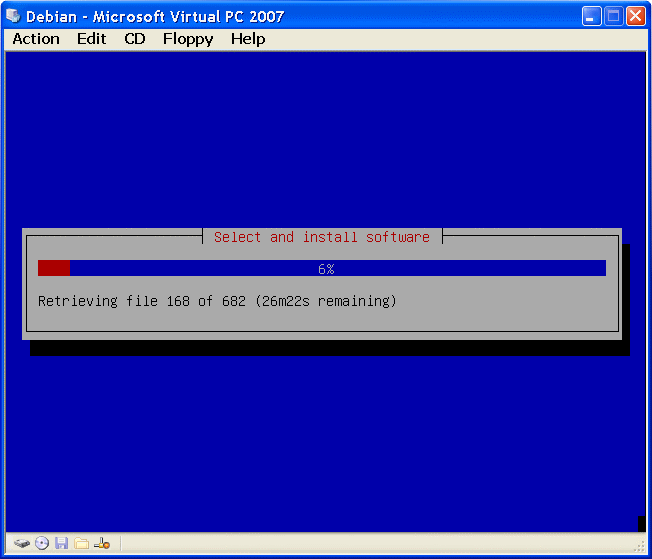
For example the following graph shows that the source of updates for the installed operating system over a computer network chosen CARNet. During these operations can be skipped prompt 'proxy' settings. Users who do this procedure in a way that they have a common network infrastructure or have PPPoE mechanism - router mode to connect to the Internet through the router at home (authorization of users enrolled in the router) will not have any problems. If this procedure is done on a computer user requesting authorization from PC (PPPoE mechanism - bridge mode) have to do it in a way that the proceedings before downloading packages included, as shown in Figure 7.6.3c, /Network connections/-/Brodband connection name/-/Properties/-||Advanced||-|Alow other network users to connect through this comoputer's internet connection|, because since the server still can not independently perform authorization. 'APT' mechanism to upgrade packages in the Debian operating system will automatically perform this upgrade, which can be monitored as shown in Figure 5.5b. If the selected seat no necessary complement to choose someone else, but to keep an eye on the previously mentioned audit tag.

|
| Figure** 5.5 Source supplement the basic packages / Select additional packages. ( + / - ) |
In addition to these updates the base system must also respond to a query that is even more software packages want to install as shown in Figure 5.5c, where the source /Standard system/ recommended, and the others are given a customized according to user needs. In this example, you install the Virtual PC system is not selected even one group of additional software packages, and has installed a minimal setup. Selections are made <Space Bar> key, and until the election <Continue> to continue the installation and acceptance of selected options, comes via the <TAB>. Condition is recorded and the process continues pressing <Enter> key. For the simplest server should be chosen according to the example. 'Desktop' environment not necessary, but will be used for the following discussion regarding the 'X Window' graphical interface. It follows after downloading the required packages and their automatic installation and select the resolution graphical display.

|
| Figure** 5.6 Download Package / Option resolution display / Start menu. ( + / - ) |
If after installing the shows 'smeared screen' cause is an inadequate depth of color emulated graphics card. In that case, reset the server and when the image appears 5.6c from GRUB menu to choose the option that says 'single-user mode' in order to come to the text mode for the root user by entering your password and give the command:
sed -e 's/^DefaultDepth.*/DefaultDepth 16/' -i /etc/X11/xorg.conf
Therefore, an adjustment of the content of the configuration file /etc/X11/xorg.conf, what could be done and then transferring the image to a text console keyboard command <CTRL> + <ALT> + <F1>, logging in as root and entering the above command line. It is then necessary to stop and restart the service that cares about displaying images command:
invoke-rc.d gdm restart
which also automatically switch the operating system in a graphical display. Besides, regarding the display visibility in Virtual PC, is useful in the file xorg.conf to change the display resolution from 800×600 px at 640×480 px for all modes of operation with the editor (Vi, Pico or another). This could make when applying (log-in) through graphical display, but then you would apply to all modes of operation, but only for the log-in user. No proper configuration without the intervention of 'hands on'. Working in a console or terminal-emulator, knowledge controls the operating system and work with the Vi editor is the default. It should be noted that the directory [X11] begins capitalized, which should be taken into account because Linux is case sensitive operating system as regards the user names, names of files and directories. Command <Ctrl> + <ALT> + <F1> to <Ctrl> + <ALT> + <F6> used to access the computer via 6 available virtual terminal - console in text mode, and the number of active terminals can be seen from the record the top of the screen, ' Debian GNU / Linux 5.0 COMPUTER_NAME ttyX '. Command <Ctrl> + <ALT> + <F7> leads into a graphical display.
Just work from the console to 'manual' repair defects parameters. When the computer finishes loading the operating system with <Ctrl> + <ALT> + <F1> activate the console in text mode, log on as an administrator and use the editor to modify xorg.conf file contents with the data for the default color depth (DefaultDepth) and display resolution (modes), and the command ' init 6 ' execute a restart (restart) without rebooting. The new parameters will be loaded and displayed undistorted image. Changes can also be made by choice |Debian GNU/Linux, kernel 2.6.26-2-686 (single-user mode)| in the initial GRUB menu, you can not load graphics mode.
In each of the terminals should be reported (log-in) that could be used, which means that different users can log-in. Very handy if you are in a console command or start a service in another track records what works in its log files. Virtual Terminal is a pseudo-monitor. Should note the difference between the consoles, terminals and terminal emulators.
Previously shown images are a window that displays a virtual computer, in this case Microsoft Virtual PC as a Linux server, which is its window display (can be viewed in 'Full Screen' mode) and keyboard input device server - hence console. Therefore, if the images are still closer look it can be observed that the root user is identified by what he PROMPT ends with a ' # ' as root user ends with a ' $ ', as shown in Figure 5.1.2a.
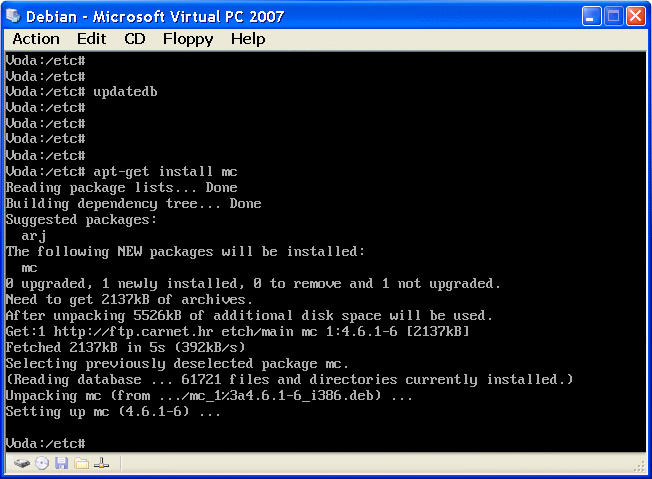
Figure 5.7 shows that the computer, which is given the name of 'voda' active user 'root', which is currently looking at something in the directory [/etc] as well read the prompt. Directories when operating the system recognizes are separated by ' / '. What is very important is the outstanding feature of the Linux OS that distinguishes uppercase and lowercase letters and you should watch what he enrolled in the individual queries as far as the user name and password. Command that is given must be written in lowercase if named in lowercase. 'sed' is not the same as 'SED'.

|
| Figure** 5.7 Console display / Graphics user log-in / Appearance of the desktop. ( + / - ) |
On the computer the user can log-in as ROOT from the console only. As in this example, the installation uses the new computer, upon completion of the installation and turn on the computer at the end of follow request to enter the user_name and password in graphical mode as shown in Figure 5.7b. Graphics mode is not recognized by the user ROOT.
Graphics mode again can have multiple interfaces most notably KDE (K Desktop Environment) and GNOME (GNU Object Modeling Environment), all of which are organized according to the X Window concept that is fundamentally based on a client-server architecture, which roughly means that it is possible with one X client computers to work in a graphical interface using the X server, which is on the same or another computer on the network. Of course, individual computer must have installed both components of the X Window System. KDE looks like Windows XP - a START button and a similar menu. In Figure 5.7c is an example of the GNOME interface by default in the initial distribution. Of course, any graphical interface is a set of software packages to be installed, or can not be installed if the primary function of the computer - the SERVER.
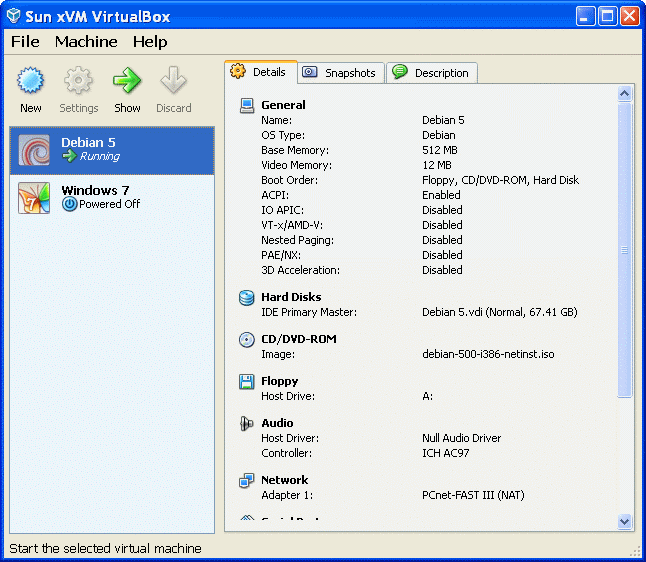
'Virtual PC' is not the only solution that can be used for the installation of the operating system as a 'visiting'. Popular software product is 'VirtualBox', originally a product of the company 'Sun Microsystems' and by taking delivery of the firm 'Oracle' is called the 'Oracle VM VirtualBox', available as a free and commercial version, a better solution is to use the Linux family of operating systems. For the version of the operating system 'Debian' picks up debian-××××-netinst.iso files, perform initial installation and then installing the complete system over a network. There is no additional setup required installed operating system. Regularly issued the updated 'VirtualBox' to boost support for the newer features and 'guest' operating systems. The mechanism of operation is quite similar to the previously described, using the configuration file is 'visiting' the operating system type. Corresponding .xmll her virtual disk type .vdi. 'VirtualBox' is published in versions for installation on the host operating system Windows (x86, AMD64), Linux (mostly x86, AMD64), Macintosh (Intel) and OpenSolaris (x86, AMD64) that can 'accommodate' the following operating systems: Windows 3.1, 95, 98, ME, NT, 2000, XP, 2003, Vista, 2008, 7 - Linux, Debian, openSUSE, Fedora, Gent, Mandriva, Red Hat, Ubuntu, Xandros - Solaris, OpenSolaris - FreeBSD, OpenBSD, NetBSD - OS/2 - DOS, Netware. So, in relation to the 'Virtual PC' this software is versatile. The next set of pictures illustrating the basic features 'VirtualBox' software, the menu on the reach and run the installation .ISO operating system files and the final installation of 'Debian 5' operating system.

|
| Figure** 5.8 Sun XVM VirtualBox - Media Manager / Debian 5 (Lenny). ( + / - ) |
No means to be forgotten for program support 'Virtual PC' install 'Guest Additions ...' because the availability of the 'visiting' the operating system will not be complete. Accessories included with the program support 'Virtual PC' does not encompass all of these operating systems. The commercial version over the free version differs in support for RDP (Remote Desktop Protocol) server, support for USB over RDP, the iSCSI (Internet Small Computer System Interface) support, and a couple extra features for personal use are not significant.
Installing 'Debina 5' operating system on 'VirtualBox' differs from the 'Virtual PC' in that introductory installation parameters not know automatically detect virtual environments. As for this, to further define the existing installation parameters as follows:
Stated is merely part of the problem because it still is not available adjust sound and graphics cards. As for this, by installing OS should do the following:
    Section "Device"
        Identifier "Configured Video Device"
    EndSection
    Section "Monitor"
        Identifier "Configured Monitor"
        HorizSync 30-70
        VertRefresh 50-160
    EndSection
    Section "Screen"
        Identifier "Default Screen"
        Monitor "Configured Monitor"
        DefaultDepth 16
        SubSection "Display"
            Depth 16
            Modes "1280x1024" "1024x768"  "800x600" "640x480"
            Virtual 640 480
        EndSubSection
    EndSection
These same parameters regarding graphics cards are listed on the previous page, and just what are the values of variables 'aligned' was used as a tab when entering data, the configuration files in the Linux OS is not significant. Besides a default resolution of the display is reduced and excluded occasional option to display both USED virtual environment was suitable for the purposes of this book.
Parameters 'noreplace-paravirt', 'vga=791' and possibly 'clocksource=pit' to control time to add to the GRUB menu (file /boot/grub/menu.lst) as the default option nuclei (default kernel options), with whom begins operating system. Described allows efficient implementation of virtual environments, but can not be installed 'VM Additions' because there is no suitable software package prepared by the distributor.
All of the above can easily be done only if the installation is done through the complete set of installation media, and not through the initial network .ISO file in which the final product to come through the update by downloading the required packages over the network. Installation over the network can be conducted only with the 'router' mode ADSL access device to the network authentication settings have enrolled in the ADSL settings (SOHO) equipment, but not in 'bridge' mode of ADSL devices in which the authorization is done by writing the authorization in the settings of the OS. A good solution to the inability to use the SOHO environment, for example, the installation of 'Lenny' in the firm over fast networks, and copies .VHD file can then be used at the discretion.
SUMMARY:
Above procedure is possible because Linux recognizes truly extensive range of devices, including virtual machines. At the CORE (kernel) operating system draws a crowd modules that are loaded as needed, and if the user really wants to very good performance computer then be required device drivers and modules installed in the core and get the most effective solution for the computer to which the nucleus has prepared. This approach enables a truly flexible environment that is emerging regarding hardware solutions can be quickly supplemented by adding new modules. The Linux community cares about keeping up with new solutions, and are in this sense the core continuously upgraded and daily firm stable foundation of the system is getting better and better and more versatile. No wonder that the Linux platform is increasingly present in the server and that is the basis for GRID structure (super-computers), all of which are widespread. Not only on the servers; using Linux and mobile phones, and maybe in due time used watches or other major appliances like washing machines. This author has a washing machine without Linux, but there is no smart phone or an expensive watch as some Croatian officials.
Linux does not require a powerful resource for the installation. Needs 1.5 GB of disk space for the system and 256-1000 MB for [SWAP] file or partition. [SWAP] partition is a virtual memory system, which is basically double in size larger than the size of available physical memory (RAM), which makes sense if it is a bit of physical RAM, up to 1 GB. But as the cost of RAM today, the computer is installed a few GB of RAM, enabling small [SWAP] partition. The higher amount of RAM means less moving content into virtual memory, disk use less resources, thus speeding up the system as a whole. The system should not be designed so that there is no virtual memory, the size of 256 MB would be a minimum. Requires one active primary root partition [ / ] not less than 32 MB they rely on-hung-mount other logical partitions. It is recommended that the partition [ / ] is 1.5 GB or 3 GB if you have enough disk resources for comfortable operation. As an extended partition is good to have [/boot] partition at least 100 MB in size, which stores the core and its image (kernel images), and part of LILO or GRUB loader is to load the OS, this partition contains absolutely necessary for the system to start up (BOOT). Size of other partitions is determined by the needs and the size of the disk.
Sequence installation of the operating system 'Debian 7' by the table shown on the previous page is included as a sequence of images in the file 'Debian-7.pdf' which can be downloaded here. Differences in the already described are of great importance with regard to the procedure, but much more complete sequence of images (over a hundred images) in relation to the so far presented. Adequately specified file 'Debina-8.pdf' can be downloaded here. Debian is a very acceptable solution for devices that do not require large resources, and are intended to enable a device to access the network, or access the device via the network resources, such as for example the NAS device WD 'My Book Live' WD 'My Book Live Duo' and similar devices of mentioned or other purpose.
If the installation is done in a SOHO environment, no matter whether it is a physical or virtual computer must turn on the DHCP service on SOHO devices and turn off any security protection as IP and MAC filtering of address regardless of unhindered access to the Internet. The network settings after installing can be adjusted subsequently according to the planned local network scheme, as the example in Figure 7.4.16.
|
Citing of this page: Radic, Drago. " Informatics Alphabet " Split-Croatia. {Date of access}; https://informatics.buzdo.com/file. Copyright © by Drago Radic. All rights reserved. | Disclaimer |